This post is part 2 of the “”11i to R12.1.3 upgrade”” series. For other parts click on below links.
1) Install Fresh EBS 11i on Linux 5 32 Bit (PART 1 in “11i to R12.1.3 upgrade” series)
2) Upgrade database 9.2.0.6 to 11.2.0.4 in 11i (PART 2 in “11i to R12.1.3 upgrade” series)
3) 11i Split configuration- Move 11g Database to Linux 6 64Bit (PART 3 in “11i to R12.1.3 upgrade” series)
4) Upgrade 11i TO R12.1.1 (PART 4 in “11i to R12.1.3 upgrade” series)
5) Upgrade R12.1.1 To R12.1.3 (PART 5 in “11i to R12.1.3 upgrade” series)
This post has been arranged in below steps:
1. Pre-Upgrade steps for database upgrade from 9.2.0.6 to 9.2.0.8
2. Shut down Applications/Database server processes
3. Perform 9.2.0.8 Patch Set installation tasks
4. Apply additional 9.2.0.8 RDBMS patches
5. Perform 9.2.0.8 Patch Set postinstallation tasks
6. Apply Developer 6i v6.0.8.27 (Patch 18) or higher
7. Upgrade JDK version 5 on HTTP server node
8. Apply Pre-req Patches to 9.2.0.8 ORACLE_HOME
9. Upgrade the TIMEZONE Version
10. Create new oracle home directory
11. Install 11g upgrade database software only
12. Set 11.2 environment
13. Run the script cr9idata.pl
14. Install Oracle database examples
15. Compile invalids in existing 9i database
16. Check for connect role
17. Save dblink information
18. Copy pre-upgrade script and execute
19. Gather schema statistics
20. Check Data Dictionary
21. Check Database consistency
22. Resolve any outstanding unresolved distributed transaction
23. Ensure the users sys and system have ‘system’ as their default tablespace.
24. Truncate aud$ table
25. Saving database files location
26. Set the database in NoArchivelog mode
27. Apply additional 11.2.0.4 rdbms patches
28. Disable database vault
29. Make a backup of the init<sid>.ora file
30. Create the diagnostic directory
31. Check environment variables
32. Update the oratab entry
33. Stop database & applications
34. Upgrade 9i to 11g using dbua or manual method
35. Review alert log
36. Verfication
37. Resize redo log groups
38. Check compatibility version
39. Install olap
40. Perform patch post-install instructions
41. Fix korean lexers
42. Start the new database listener
43. Run adgrants.sql
44. Grant create procedure privilege on ctxsys
45. Set ctxsys parameter
46. Run autoconfig
47. Gather statistics for sys schema
48. Re-create grants and synonyms
49. Enable database vault (conditional)
50. Restart applications server processes and verify
51. Upgrade JDK to version 6.0
52. Using jre 1.7 with oracle apss 11i
1. Pre-Upgrade steps for database upgrade from 9.2.0.6 to 9.2.0.8
Below patches need to be applied.
1.1) Apply patch 5035661
This patch should be unloaded into both the RDBMS and IAS ORACLE_HOMEs
on all the Nodes.
Download patch 5035661 and follow instructions in the readme file. This patch installs OUI 2.2.0.19 and fixes inventory directories
A. Applying the patch on the iAS $ORACLE_HOME:
unzip -od <iAS ORACLE_HOME> p5035661_11i_<PLATFORM>.zip
Source the Apps environment file
Change directory to the $IAS_ORACLE_HOME/appsoui/setup
Execute the perl script OUIsetup.pl:
$ perl OUIsetup.pl
B. Applying the patch on the RDBMS $ORACLE_HOME:
unzip -od <RDBMS ORACLE_HOME> p5035661_11i_<PLATFORM>.zip
Source the DB environment file
Change directory to the $ORACLE_HOME/appsoui/setup
Execute the perl script OUIsetup.pl:
$ perl OUIsetup.pl
2. Shut down Applications/Database server processes
Shut down application and database services by standard methods.
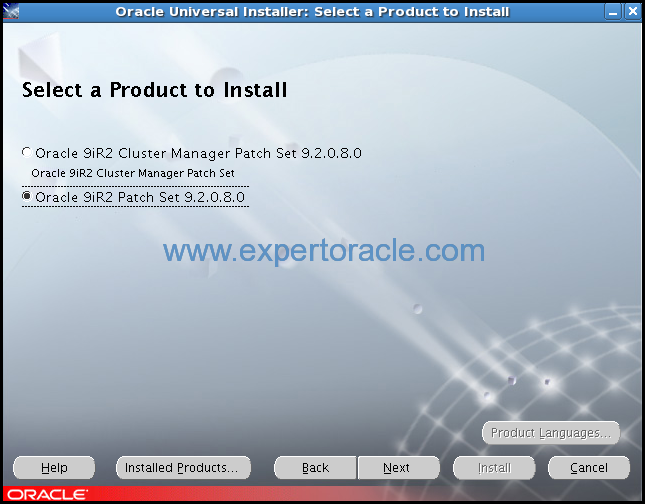
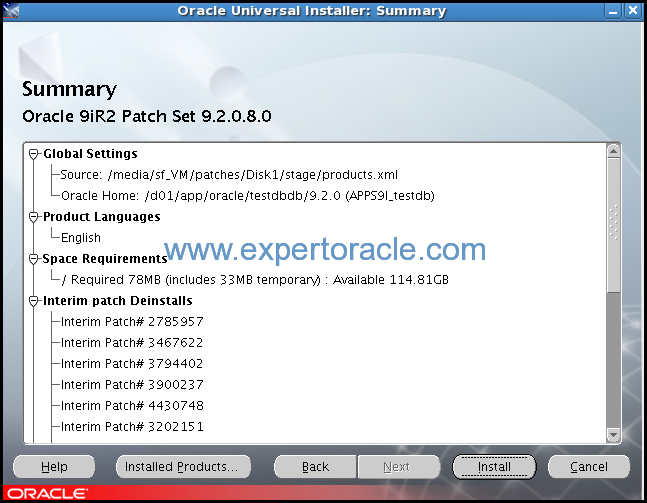
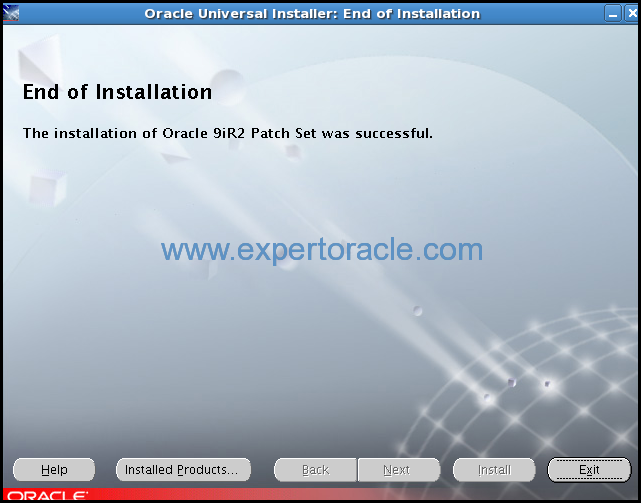
3. Perform 9.2.0.8 Patch Set installation tasks
9.2.0.8 patchset is provided by patch 4547809. Download and extract the patch set p4547809_9208_LINUX.zip installation archive to a directory that is not the Oracle home directory or under the Oracle home directory. For example, Oracle_patch.
Enter the following commands to unzip and extract the installation files:
$ unzip p4547809_9208_LINUX.zip
Log in as the Oracle software owner (typically oracle).
NOTE: you will need to edit oraparam.ini in the patch software and add REDHAT-5 as the eligible OS or else runInstaller will fail.
Enter following commands to start Oracle Universal Installer, where patchset_directory is the directory you unzipped the patch set software:
$ cd patchset_directory/Disk1
$ ./runInstaller
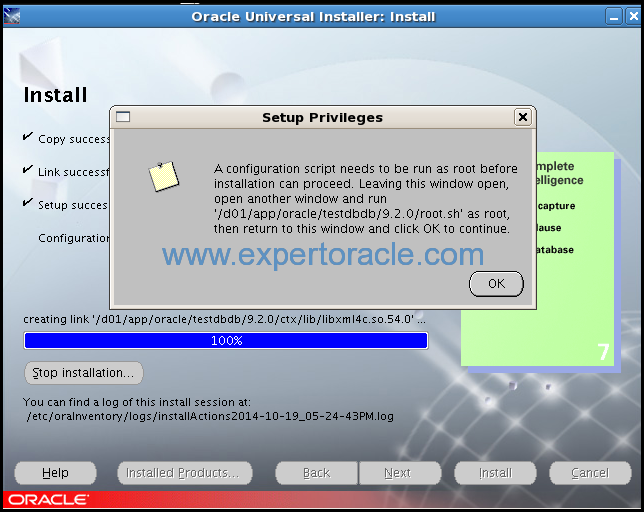
[root@r12upg ~]# sh /d01/app/oracle/testdbdb/9.2.0/root.sh
 Running Oracle9 root.sh script...
 \nThe following environment variables are set as:
 ORACLE_OWNER= oracle
 ORACLE_HOME= /d01/app/oracle/testdbdb/9.2.0
Enter the full pathname of the local bin directory: [/usr/local/bin]:
 Copying dbhome to /usr/local/bin ...
 Copying oraenv to /usr/local/bin ...
 Copying coraenv to /usr/local/bin ...
 Adding entry to /etc/oratab file...
 Entries will be added to the /etc/oratab file as needed by
 Database Configuration Assistant when a database is created
 Finished running generic part of root.sh script.
 Now product-specific root actions will be performed.
4. Apply additional 9.2.0.8 RDBMS patches
We will need couple more patches on top of 9.2.0.8.
i) Patch 5391326 : APPSST9208 MULTIPLE INDEX ERRORS WHILE RUNNING FULL IMPORT FOR 9.2.0.8 DB
$ export PATH=$ORACLE_HOME/OPatch:$PATH
Below command must run successfully.
$ opatch lsinventory
Now apply patch
 $ cd 5391326
 $ opatch apply
ii) Patch 5495695 : APPSST9208: SQL*PLUS EXITS WITH O/S MESSAGE: NO SUCH FILE OR DIRECTORY
 % cd 5495695
 % opatch apply
 % mv $ORACLE_HOME/sqlplus/lib/sqlplus $ORACLE_HOME/bin/sqlplus
5. Perform 9.2.0.8 Patch Set postinstallation tasks
Use SQL*Plus to log in to the database as the SYS user with SYSDBA privileges:
$ sqlplus /nolog
 SQL> CONNECT SYS/SYS_password AS SYSDBA
 SQL> STARTUP
a) CHECK THE SYSTEM TABLESPACE SIZE (REQUIRED SIZE 10MB;)
SQL> SELECT TABLESPACE_NAME,SUM(BYTES/1024/1204) FROM DBA_FREE_SPACE WHERE TABLESPACE_NAME='SYSTEM' group by TABLESPACE_NAME;
TABLESPACE_NAME SUM(BYTES/1024/1204)
 ------------------------------ --------------------
 SYSTEM 2031.6412
b) Make sure that the init.ora parameters SHARED_POOL_SIZE and JAVA_POOL_SIZE are each 150 MB or more
Determine the current values of these parameters:
SQL> SHOW PARAMETER SHARED_POOL_SIZE
SQL> SHOW PARAMETER JAVA_POOL_SIZE
If necessary, set the value of the initialization parameter to at least 150 MB:
Example (if using spfile):
SQL> ALTER SYSTEM SET JAVA_POOL_SIZE='150M' SCOPE=spfile;
c) Start Listener:
$ lsnrctl start testdb
d) Run the catpatch.sql
Shutdown the database now
$ sqlplus /nolog
 SQL> CONNECT SYS/manager AS SYSDBA
 SQL> SHUTDOWN IMMEDIATE
 SQL> startup migrate
 SQL> spool patch.log
 SQL> @$ORACLE_HOME/rdbms/admin/catpatch.sql
 SQL> spool off
Review the patch.log file for errors and inspect the list of components that is displayed at the end of catpatch.sql script.
This list provides the version and status of each SERVER component in the database.
If necessary, rerun the catpatch.sql script after correcting any problems.
Restart the database now
SQL> shutdown immediate
SQL> startup
e) COMPILE INVALID OBJECTS
Run the utlrp.sql script to recompile all invalid PL/SQL packages now instead of when the packages are accessed for the first time. This step is optional but recommended.
SQL>@$ORACLE_HOME/rdbms/admin/utlrp.sql
f) Java virtual machine related steps
**After completion of the above post install steps, connect as SYSDBA and run the following:
 SQL> @$ORACLE_HOME/javavm/install/jvmsec3.sql
 SQL> @$ORACLE_HOME /javavm/install/jvmsec5.sql
g) Gather statistics for SYS schema
Use SQL*Plus to connect to the database as sysdba and gather the statistics for the SYS schema using the following commands:
SQL> execute dbms_stats.gather_schema_stats
 ('SYS',cascade=>TRUE,degree=>20);
6. Apply Developer 6i v6.0.8.27 (Patch 18) or higher
Some of the pre-req patches which will be applied to 11i applications will require the Developer 6i to be at patchset 18 (6.0.8.27) or higher
Our current 11i version is lower than the required value.
[oracle@r12upg bin]$ $ORACLE_HOME/bin/f60gen help=y
 Forms 6.0 (Form Compiler) Version 6.0.8.25.2 (Production)
We will upgrade it to Dev 6i Patch 19.
Step 1: Stop All application services
$ cd $COMMON_TOP/admin/scripts
 $ ./adstpal.sh apps/apps
Step 2: Install the Developer 6i Patch 6194129
The patch will be applied to 8.0.6 ORACLE_HOME.
 $ echo $ORACLE_HOME
 /u01/app/oracle/testdbora/8.0.6
• Prepend $ORACLE_HOME/bin to the *beginning* of PATH
$ export PATH=/u01/app/oracle/testdbora/8.0.6/bin:$PATH
• Prepend $ORACLE_HOME/lib to the *beginning* of LD_LIBRARY_PATH
$ export LD_LIBRARY_PATH=/u01/app/oracle/testdbora/8.0.6/lib:$LD_LIBRARY_PATH
• Copy the files in this patch to your $ORACLE_HOME.
• Unzip the patch using unzip on Unix.
• Run the install script contained in the patch:
 $ cd $ORACLE_HOME/developer6i_patch19
 $ ./patch_install.sh 2>&1 | tee patch_install_p19.log
• Check patch_install_p19.log for errors.
• Relink Procedure Builder, Forms, Graphics and Reports:
$ cd $ORACLE_HOME/procbuilder60/lib; make -f ins_procbuilder.mk install
 $ cd $ORACLE_HOME/forms60/lib; make -f ins_forms60w.mk install
 $ cd $ORACLE_HOME/graphics60/lib; make -f ins_graphics60w.mk install
Reports has both link-time and run-time dependency with libjava.so so you need to append $ORACLE_HOME/network/jre11/lib/linux/native_threads in $LD_LIBRARY_PATH before linking Reports.
The same $LD_LIBRARY_PATH should be used at run-time.
$ cd $ORACLE_HOME/reports60/lib;
$ make -f ins_reports60w.mk install
Step 3: Install the Additional Developer 6i Patches
A) Patch 16699473
• Copy the patch file within your 6i ORACLE_HOME and unzip this file
within it to create a new subdirectory. You will be able to see the
folder 16699473 which contains the actual one-off files.
% cd $ORACLE_HOME
 % unzip p16699473_60828_LINUX.zip
• Install the patch
%cd 16699473
% sh patch.sh
• Unzip the java class files and regenerate your JAR files
Please run below script to take backup of the class files.
 % cd $ORACLE_HOME/16699473
 % sh backup.sh
Please run below script to copy all files to $ORACLE_HOME with respective location.
 % cd $ORACLE_HOME/16699473
 % sh copy_files.sh
• For ewt3.jar please follow these additional steps:
i. Backup the Forms java subtree and extract the changed files
 % cd $ORACLE_HOME/forms60/java
 % cp -r oracle/ewt oracle/ewt.PREBUG16699473
 % jar -xvf $ORACLE_HOME/16699473/ewt3.jar
 % rm META-INF/MANIFEST.MF
 % rmdir META-INF
ii. Verify that the EWT version has been updated under the
$ORACLE_HOME/forms60/java directory.
For example:
% ls -la oracle/ewt | grep 3_4_49
iii. Now regenerate jar files using adadmin.
adadmin > regenerate jar files.
• Run adrelink.
E.g. to relink f60webmx for Oracle Applications:
% adrelink.sh force=y “fnd f60webmx”
Patch 9094950 may also be required if not applied previously
<NOT APPLIED FOR NOW>
B) Patch 3830807
% cd 3830807
Add execute permission to the script supplied in this patch
% chmod u+x patch.sh
Check the value of LD_LIBRARY_PATH.
#
# This patch will relink reports60 binaries.
#
# Reports has both link-time and run-time dependency with libjava.so
# so you need to include
# $ORACLE_HOME/network/jre11/lib/linux/native_threads
OR
# $ORACLE_HOME/network/jre11/lib/i686/native_threads
# in $LD_LIBRARY_PATH before running patch.sh
# Run the script supplied by this patch
$ % ./patch.sh
Step 4: Relink Applications Executables
In AD Administration, choose “Relink Applications programs” from the “Generate Applications Files” menu.
7. Upgrade JDK version on HTTP server node
Per JDK vendors, JDK versions 1.3 and 1.4 are desupported. Thus, a minimum JDK version of 1.5.0 is required on HTTP server nodes.Please refer to Oracle MetaLink Note 304099.1 “Using J2SE Version 5.0 with Oracle E-Business Suite 11i” to upgrade JDK on all application tier server nodes.
DOWNLOAD AND INSTALL JAVA
DOWNLOAD
> http://www.oracle.com/technetwork/java/javase/downloads/index-jdk5-jsp-142662.html
Now INSTALL
[root@r12upg oracle]# chmod 777 jdk-1_5_0_15-linux-i586-rpm.bin
 [root@r12upg oracle]# ./jdk-1_5_0_15-linux-i586-rpm.bin
 Do you agree to the above license terms? [yes or no]
 yes
 Unpacking...
 Checksumming...
 0
 0
 Extracting...
 UnZipSFX 5.50 of 17 February 2002, by Info-ZIP (Zip-Bugs@lists.wku.edu).
 inflating: jdk-1_5_0_15-linux-i586.rpm
 Preparing... ########################################### [100%]
 1:jdk ########################################### [100%]
Done.
Now CONFIGURE:
[root@r12upg bin]# /usr/sbin/alternatives --config java
There are 2 programs which provide 'java'.
Selection Command
 -----------------------------------------------
 + 1 /usr/lib/jvm/jre-1.4.2-gcj/bin/java
 * 2 /usr/java/jdk1.5.0_15/bin/java

Enter to keep the current selection[+], or type selection number: 2
VERIFY
[root@r12upg bin]# java -version
 java version "1.5.0_15"
 Java(TM) 2 Runtime Environment, Standard Edition (build 1.5.0_15-b04)
 Java HotSpot(TM) Server VM (build 1.5.0_15-b04, mixed mode)
Apply application patch
J2SE 5.0 consolidated patch, Patch 4372996 –
This patch contains the required J2SE 5.0 upgrade script, JDBC 9iR2 Drivers for J2SE 5.0, and the E-Business Suite interoperability patches.
All pre-req patches already applied
Apply using adpatch
No post steps.
Configure all Application Tier Nodes to Support J2SE 5.0
Execute the J2SE 5.0 Upgrade Script to Update Configuration Files
Run the J2SE 5.0 upgrade script to upgrade the configuration template files for each [APPL_TOP]. Enter the appropriate commands and follow the instructions given by the script:
txkrun.pl -script=SetJDKCfg -contextfile=$CONTEXT_FILE -runautoconfig=Yes -appspass=apps -jdktop=/usr/java/jdk1.5.0_15
Regenerate the appsborg2.zip File & Product JAR Files
Refresh the environment variables by sourcing the appropriate environment file
Run AD Administration, and choose “Generate Product JAR Files” from the “Generate Applications Files” menu to update appsborg2.zip to include the new JDBC Drivers for the J2SE 5.0 library (jdbc14.zip) and to generate the product JAR files.
Since the AD utilities has been upgraded to use J2SE 5.0, this step will ensure that the jar files are signed with the key store data that is valid for the new version of J2SE.
Verify Configurations on all Application Tier Nodes
Open the $APPL_TOP/admin/adovars.env file and ensure that the environment variables below are defined. Run the following commands to verify that the environment variables ADJVAPRG and AFJVAPRG point to the J2SE 5.0 executable. The CLASSPATH and AF_CLASSPATH environment variables must contain the necessary J2SE 5.0 libraries.
$ADJVAPRG -version
 echo $CLASSPATH
$AFJVAPRG -version
 echo $AF_CLASSPATH
The output of the version check should display J2SE “1.5.0_x”, where x depends on the J2SE 5.0 patch level installed.
Also, Log in to the E-Business Suite and select the “System Administrator” responsibility. Check the Concurrent/Manager/Administer form and make sure all managers have the corresponding numbers for their actual and target.
8. Apply Pre-req Patches to 9.2.0.8 ORACLE_HOME
Before upgrading to 11.2.0.4 database, we need to apply couple of patches to our 11i setup.
Stop the 11i application and apply maintenance mode.
1) Patch 3460000 – 11.5.10 E-Business Suite Consolidated Update 2
This patch is already present in our 11i system.
SQL> select BUG_ID, BUG_NUMBER, LAST_UPDATE_DATE from APPLSYS.AD_BUGS where BUG_NUMBER in (‘3460000’);
BUG_ID BUG_NUMBER LAST_UPDATE_DAT
———- —————————— —————
187886 3460000 13-JUL-05
2) Patch 8815204 – 11g Release 2 interoperability patch for 11.5.10
This patch requires additional prerequisite patches:
3384350 – Patch 11i.SCM_PF.J
3180816 – Patch 11i.AD.I
2368042 – Patch 11i.JTA.D (JTA 11.5.7.6)
8217898 – TXK AUTOCONFIG AND TEMPLATES ROLLUP PATCH T
3882116 – REHOST ORACLE 9iR2 JDBC DRIVERS (v9.2.0.5) FOR USE WITH ORACLE
APPLICATIONS 11i
3262159 – Patch 11i.FND.H
Out of the above 6 patches, 5 are already present in our system:
SQL> select BUG_ID, BUG_NUMBER, LAST_UPDATE_DATE from APPLSYS.AD_BUGS where BUG_NUMBER in (‘3384350′,’3180816′,’2368042′,’8217898′,’3882116′,’3262159’);
BUG_ID BUG_NUMBER LAST_UPDATE_DAT
———- —————————— —————
54229 2368042 25-OCT-02
107313 3180816 26-OCT-04
142934 3262159 27-OCT-04
153347 3384350 27-OCT-04
133461 3882116 27-OCT-04
So missing only 8217898.
Patch 8217898 is superseded by Patch 9535311
2.1 Apply Pre –req Patch 9535311: TXK AUTOCONFIG AND TEMPLATES ROLLUP PATCH U
Pre-steps for Patch 9535311
$ cd $<patch_directory>/fnd/patch/115/bin
$ ./txkprepatchcheck.pl -script=ValidateRollup -outfile=$APPLTMP/txkValidateRollup.html -appspass=apps
• Review the txkValidateRollup.html report generated by the validation script. Perform the required actions described in the report before you apply this patch.
• It is recommended for customers to upgrade to JDK 1.3.1_15 or higher on the database tier. See Note 165195.1
• Customers should be on Developer 6i patchset 18 (6.0.8.27) or higher before uptaking patch 9535311. See Note 125767.1.
Apply patch 9535311
Apply using adpatch
Post-steps for Patch 9535311
• Run autoconfig on application node.
• Update the RDBMS ORACLE HOME file system with the AutoConfig files
On the Application Tier (as the APPLMGR user):
Create the appsutil.zip file by executing:
$ADPERLPRG $AD_TOP/bin/admkappsutil.pl
This will create appsutil.zip in $APPL_TOP/admin/out
On the Database Tier (as the ORACLE user):
Copy or FTP the appsutil.zip file to the <RDBMS ORACLE_HOME>
$ cd <RDBMS ORACLE_HOME>
$ unzip -o appsutil.zip
• Run AutoConfig by executing:
$ORACLE_HOME/appsutil/scripts/$CONTEXT_NAME/adautocfg.sh
• If $OA_HTML/bin/appsweb.cfg contains specialized configuration entries within its “BEGIN CUSTOMIZATION” and “END CUSTOMIZATION” section, copy that section to appsweb_<context name>.cfg . Please confirm even if you have already done this before.
• Customers who have not used the latest version of AutoPatch, delivered via AD Minipack 11i.AD.I.4 (4712852), are suggested to regenerate jar files by running adadmin, selecting the “Generate Applications Files” option, and subsequently selecting the “Generate product JAR files” option.
SQL> select patch_level from fnd_product_installations where patch_level like '%AD%';
 PATCH_LEVEL
 ------------------------------
 11i.AD.I.2
Since we are on AD.I.2 yet, we need to do this step.
• Remove the log file sec_audit.log from the following location(s)
if it exists:
* [iAS_ORACLE_HOME]/Apache/Apache/logs/ .
* [iAS_CONFIG_HOME]/Apache/Apache/logs on installations where a
Shared Oracle Home is configured.
2.2) Apply main Patch 8815204 – 11g Release 2 interoperability patch for 11.5.10
Apply using adpatch
3) 5644137: PLM_PF.C: USE OF LITERAL CAUSING PERFORMANCE ISSUE WHEN INSERTING DATA INTO USER DEFINED ATTRIBUTES TABLES
Pre-requisite or Co-requisite which is not included with this patch:
Product Lifecycle Management Family Pack 11i.PLM_PF.C (ARU 3298676)
<<ALREADY PRESENT>>
Apply using adpatch
4) 7429271: Patch 11i.AD.I.7: PATCH FOR 11I.AD.I.7
PRE-STEP:
1. Create $ORACLE_HOME/appsutil/admin on the database server.
2. Copy adgrants.sql (UNIX) from this patch directory to
$ORACLE_HOME/appsutil/admin.
Or, copy adgrants_nt.sql (Windows) from this patch directory to
%ORACLE_HOME%\appsutil\admin.
3. Set the environment to point to ORACLE_HOME on the database server.
4. Use SQL*Plus to run the script:
UNIX:
$ sqlplus /nolog
SQL> @$ORACLE_HOME/appsutil/admin/adgrants.sql <APPS schema name>
Now apply patch using adpatch
5) 6241631: Oracle Applications Technology 11i.ATG_PF.H.delta.7 (RUP 7)
PRE-STEPS
Requires 9iR2 (terminal patchset only, 9.2.0.8) – already done.
latest version of AD minipack I.7 – already done
required below pre-req mini pack patches:
3218526 – BNE: Patch 11i.BNE.D
4206794 – FRM: Patch 11i.FRM.
5.1) 3218526 – BNE: Patch 11i.BNE.D
Pre-Steps
Patch 3757164: INPUT FILTERING ONE-OFF FOR FND
Patch 2278688: Oracle Self Service Framework Version 5.6E
Patch 3358500: SSO Pre-Req for Applications Products – Rollup E
Patch 2565888: AOL Java rollup patch H.1 to replace rollup H
Patch 2666624: FNDJAR.DEP Pre-req needed for changes to JAR files: FNDSEC.JAR and FNDCCT.JAR
Patch 4252319: LANGUAGE FILE SETUP FOR BNE.D Patch 3218526
All patches except 4252319 are ALREADY APPLIED
5.1.1) Patch 4291053: LANGUAGE FILE SETUP FOR BNE.D(3218526)
4252319 is superseded by this patch.
Apply using adpatch
Post Steps:
Run AD Administration on the administration server node. From the Maintain
Application Database Objects menu, perform the following.,
a. Compile APPS schema(s)
b. Compile flexfield data in AOL tables
Now apply base patch 3218526
Use AutoPatch to apply the u3218526.drv driver file
Post Steps
Run AD Administration on the administration server node. From the Maintain Application Database Objects menu, perform the following:
a. Compile APPS schema(s).
b. Compile flexfield data in AOL tables.
Some other functional steps as mentioned in “WebADI – About Web Applications Desktop Integrator Mini-pack 11i.BNE.D (Doc ID 287080.1)”
5.2) 4206794 – FRM: Patch 11i.FRM.H
PRE-STEPS
4125550 – ATG 11.5.10 CU2 for ATG Product family
3218526 – BNE Patch 11i.BNE.D
3761838 – FRM Patch 11i.FRM.G
3761838 need to be applied.
Note: Although Oracle Report Manager Minipack 11i.FRM.H also contains the changes included in Oracle Report Manager Minipack 11i.FRM.G, for confirmation purposes Oracle recommends applying 11i.FRM.G as a prerequisite before applying 11i.FRM.H. If you have already installed 11i.FRM.G, do not remove it; instead, apply 11i.FRM.H on top of 11i.FRM.G.
5.2.1) 3761838 – FRM Patch 11i.FRM.G
PRE-REQ PATCHES
5.2.1.1) RG-3854951: FSG XML PUBLISHER DELIVERY
No pre req or post req steps. Apply using adpatch.
Now apply base patch 3761838
Post steps
you must then do the following using the adadmin utility, in the order listed below.
Generate message files
Compile APPS schema(s)
Compile flexfield data
Recreate grants and synonyms for APPS schema(s)
Remove image cache files within directory “$OA_HTML/cabo/images/cache” and style sheet cache files within directory “$OA_HTML/cabo/styles/cache” after the patch is successfully applied.
IMPORTANT: Change the permissions to 777 on the directories and $OA_HTML/cabo/styles, so that they are writable by the user who owns the apache process.
Now apply base patch 4206794
Use AutoPatch to apply the u4206794.drv driver file
POST STEPS:
After applying the unified driver, use AD Administration (adadmin) to compile menu information.
In all cases, next you must do the following using the adadmin utility, in the order listed below.
Generate message files
Compile APPS schema(s)
Compile flexfield data
Recreate grants and synonyms for APPS schema(s)
To ensure optimal performance on Cost Based Optimizer (CBO), you should re-analyze your application schemas after applying large patches. Execute the concurrent program Gather Schema Statistics from the System Administrator responsibility and choose ALL schemas. Depending upon the size of your database, this job may take several hours. However, users can use the applications while this job is running.
Remove image cache files within directory “$OA_HTML/cabo/images/cache” and style sheet cache files within directory “$OA_HTML/cabo/styles/cache” after the patch is successfully applied.
IMPORTANT: Change the permissions to 777 on the directories $OA_HTML/cabo/images and $OA_HTML/cabo/styles, so that they are writable by the user who owns the apache process.
Apply Post-install Co-requisite Patch (Required)
Apply the following patch.
3854951 – RG FSG XML Publisher Delivery
(ALREADY PRESENT)
Now apply base patch 6241631: Oracle Applications Technology 11i.ATG_PF.H.delta.7 (RUP 7)
PRE-STEPS
Executing the Technology Stack Validation Utility is a mandatory step before you upgrade to Oracle Applications Technology 11i.ATG_PF.H.delta.7 (RUP7), as this utility lists further mandatory pre-upgrade steps for your specific instance, such as upgrading to the minimum required version of Java 5 and other technologies.
In your operating system file system, navigate to the directory where you have unzipped these Applications Technology Updates
1. Establish the needed environment parameters by sourcing the Applications environment file as the owner of the application tier file system.
2. Ensure “APPLRGF” variable is set in environment. If not, set it to the same value as “APPLTMP”.
3. From the location where this patch was unzipped, change directory to fnd/patch/115/bin.
4. Run the utility as follows:
./txkprepatchcheck.pl -script=ValidateRollup -outfile=$APPLTMP/txkValidateRollup.html -appspass=apps
The utility will produce an HTML report. Review and perform any required actions before proceeding with the Applications Technology Updates.
After test is passed, Now apply the patch using adpatch
POST-STEPS
I. Apply the following patches (all releases):
3865683 – AD: Release 11.5.10 Products Name Patch
(ALREADY APPLIED)
9053932 – FND: FNDRSRUN Returns No Records When Search Criteria is Date Submitted
PRE-REQ PATCHES for 9053932
3036401 – Mini-Pack 11i.HZ.L
3618299 is latest Patch 11i.HZ.N so we will apply Patch 11i.HZ.N 3618299
No pre-req steps
Apply using adpatch
POST REQ STEPS
You must complete these steps after running the unified driver using AD Administration (adadmin):
Generate message files.
Compile APPS schema(s).
Compile flexfield data in AOL tables.
Compile menu information.
Now apply base patch 9053932 using adpatch
No post steps
II. Run AutoConfig. (Required)
III. Create APPS_TS_TOOLS Tablespace.
Customers who have migrated to the new Oracle Applications Tablespace Model must create the APPS_TS_TOOLS tablespace
The default initial size for the APPS_TS_TOOLS tablespace is 500 MB, with auto segment management enabled. If you create the APPS_TS_TOOLS tablespace through SQL*Plus, outside of the OATM utility, you can use the following statement:
CREATE TABLESPACE APPS_TS_TOOLS DATAFILE '/d01/app/oracle/testdbdata/apps_ts_tools1.dbf' SIZE 500M EXTENT MANAGEMENT LOCAL AUTOALLOCATE;
You can override these storage recommendations with storage parameters to suit the expected size required for objects that will be in the Tools tablespace at your site.
IV. Copy Fonts for Oracle XML Publisher. (Required)
Copy the following font files from $FND_TOP/resource to the /jre/lib/fonts directory (under OA_JRE_TOP and AF_JRE_TOP) on all Web and concurrent nodes. If $FND_TOP/resource does not contain the font files, apply patch 3639533: Albany (Display) Font 4.02 Release.
The font files are:
ALBANYWT.ttf - "single-byte" characters only
ALBANWTJ.ttf - Unicode font with Japanese Han Ideographs
ALBANWTK.ttf - Unicode font with Korean Han Ideographs
ALBANWTS.ttf - Unicode font with Simplified Chinese Han Ideographs
ALBANWTT.ttf - Unicode font with Traditional Chinese Han Ideographs
V. Run the Workflow Directory Services User/Role Validation concurrent program. (Required)
6) 9835302 : Autoconfig upgrade patch : TCH11201: ADBLDXML AND AUTOCONFIG COMPLETES WITH JAVA.LANG.UNSATISFIEDLINKERROR
No pre steps
Apply using adpatch
After Applying this Patch
————————-
Update the RDBMS ORACLE HOME file system with the AutoConfig files by performing
the following steps:
1. On the Application Tier (as the APPLMGR user):
1.1 Source the environment file.
1.2 Create the appsutil.zip file by executing:
$ADPERLPRG $AD_TOP/bin/admkappsutil.pl
(On Windows: %ADPERLPRG% %AD_TOP%\bin\admkappsutil.pl)
This will create appsutil.zip in $APPL_TOP/admin/out .
2. On the Database Tier (as the ORACLE user):
2.1 Copy or FTP the appsutil.zip file to the <RDBMS ORACLE_HOME>
2.2 cd <RDBMS ORACLE_HOME>
2.3 unzip -o appsutil.zip
9. Upgrade the TIMEZONE Version
Convert the 9i database TIMEZONE from version 1 to version 4:
Download this interm patch 5632264 .. Extract it .. run “opatch apply” command .. As the following:
First shutdown the database:
SQL> shutdown immediate;
Apply the patch:
$unzip p5632264_92080_timezoneV4.zip
$opatch apply
Start up the database again:
SQL> startup
The following query must return version 4:
SELECT CASE COUNT(DISTINCT(tzname))
 WHEN 183 then 1
 WHEN 355 then 1
 WHEN 347 then 1
 WHEN 377 then 2
 WHEN 186 then CASE COUNT(tzname) WHEN 636 then 2 WHEN 626 then 3 ELSE 0 END
 WHEN 185 then 3
 WHEN 386 then 3
 WHEN 387 then case COUNT(tzname) WHEN 1438 then 3 ELSE 0 end
 WHEN 391 then case COUNT(tzname) WHEN 1457 then 4 ELSE 0 end
 WHEN 392 then case COUNT(tzname) WHEN 1458 then 4 ELSE 0 end
 WHEN 188 then case COUNT(tzname) WHEN 637 then 4 ELSE 0 end
 WHEN 189 then case COUNT(tzname) WHEN 638 then 4 ELSE 0 end
 ELSE 0 end VERSION
 FROM v$timezone_names;

VERSION
 ----------
 4
10. Create new oracle home directory
Create the 11.2.0 Oracle home directory structure
$ mkdir /d02/app/oracle
11. Install 11g upgrade database software only
Log in to the database server node as the owner of the Oracle RDBMS file system and database instance. Ensure that environment settings, such as ORACLE_HOME, are set for the new Oracle home you are about to create, and not for any existing Oracle homes on the database server node.
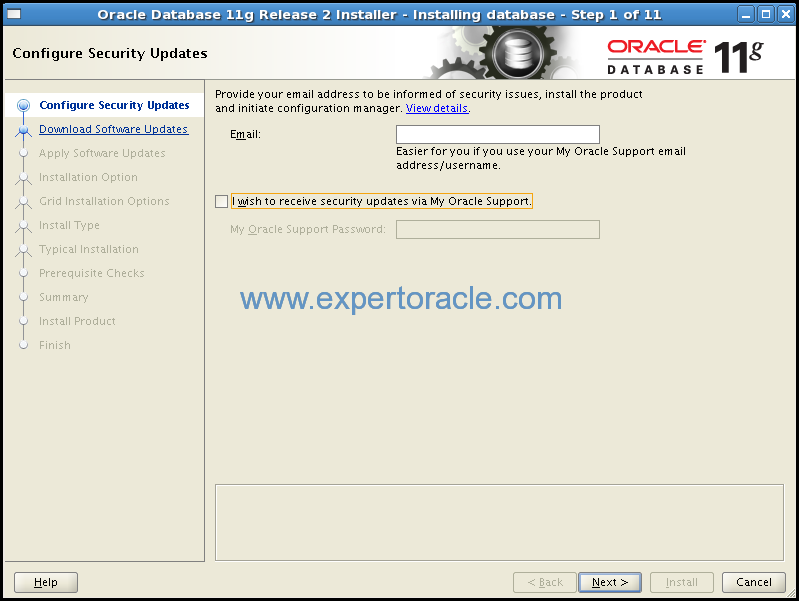
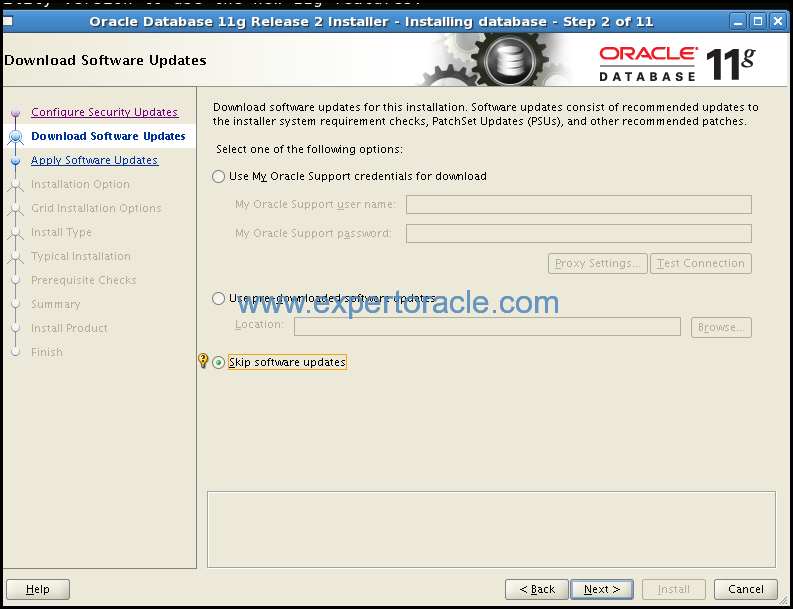
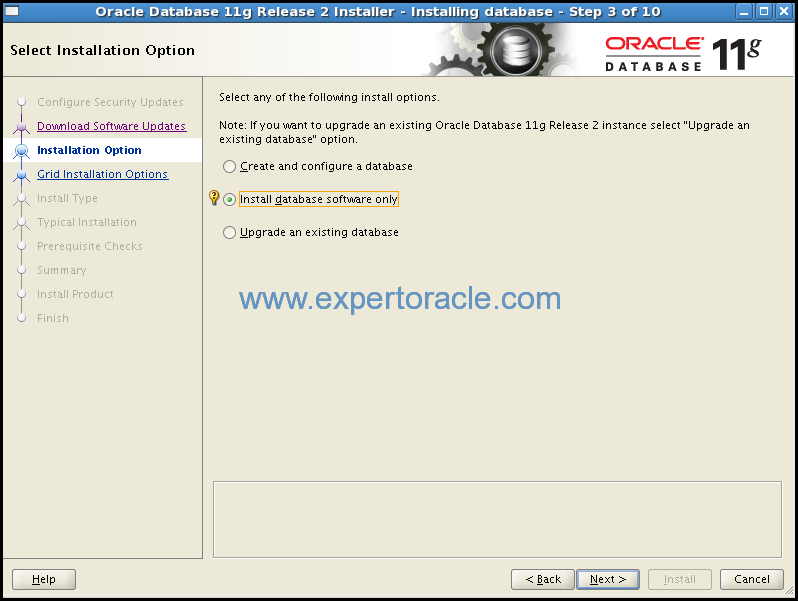
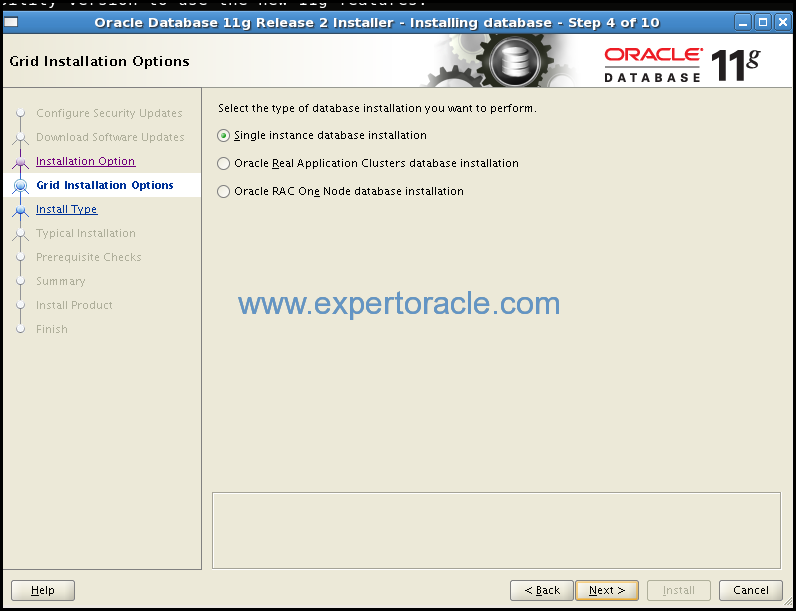
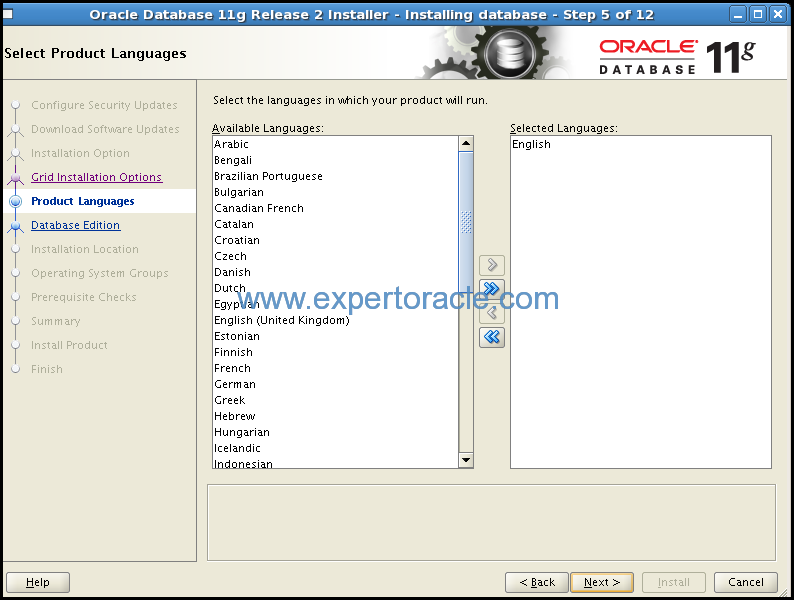
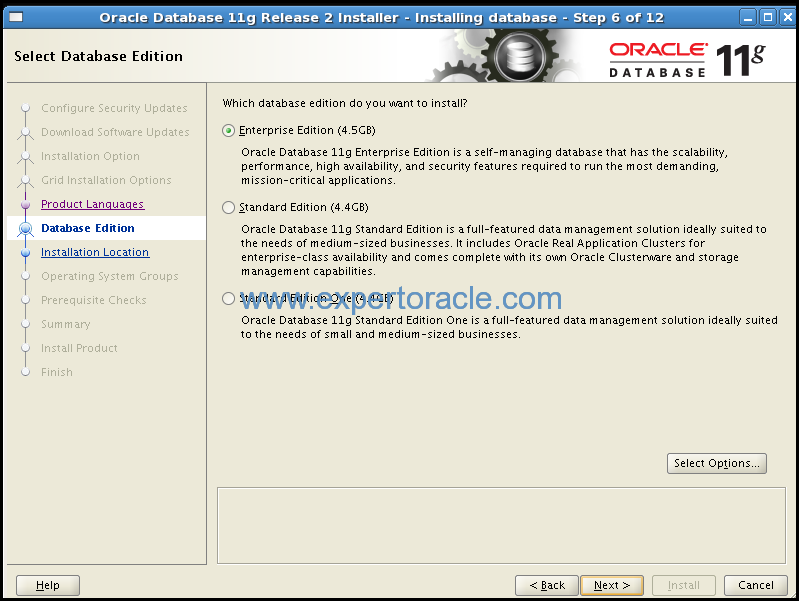
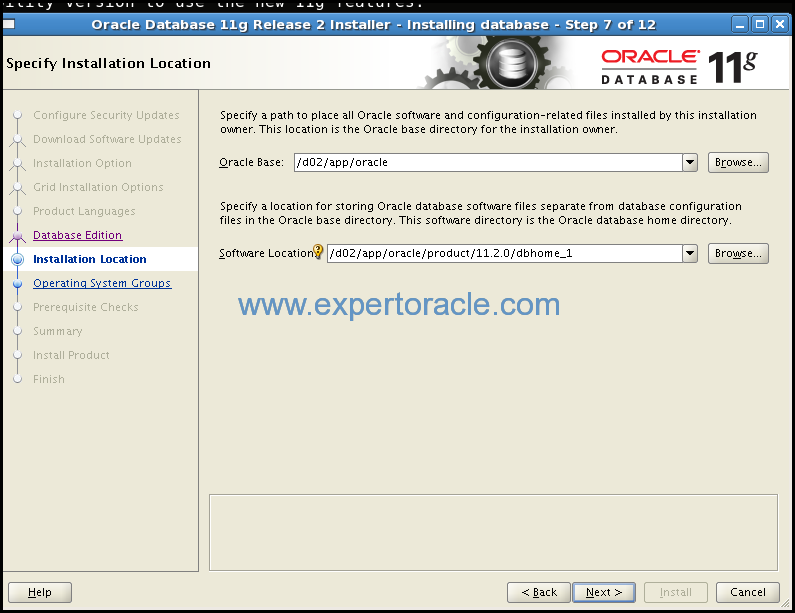
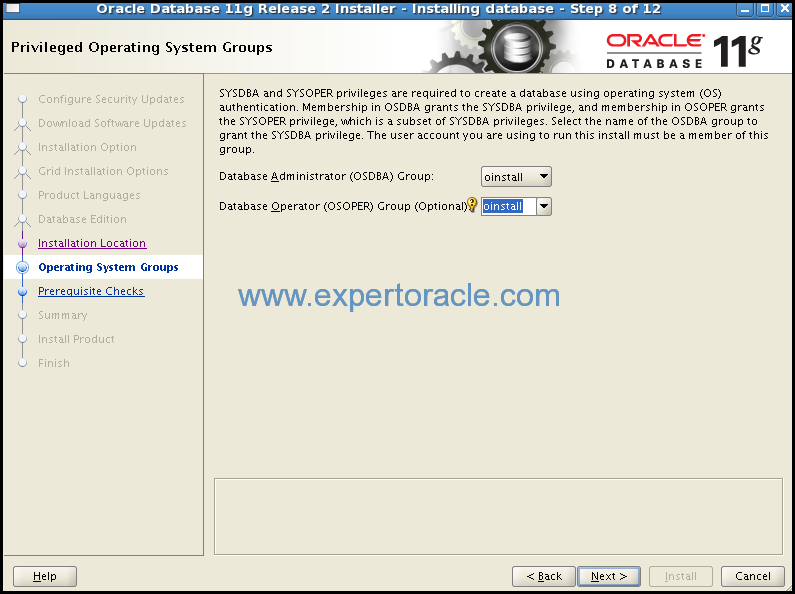
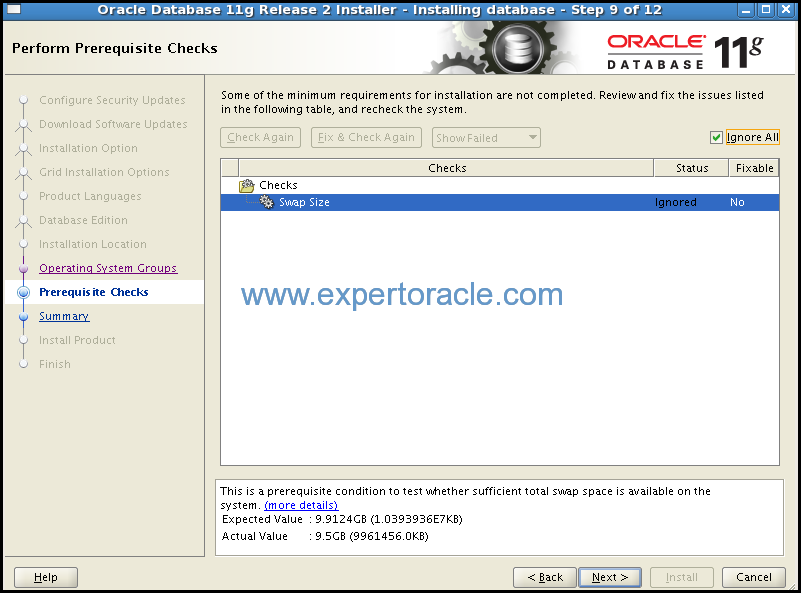
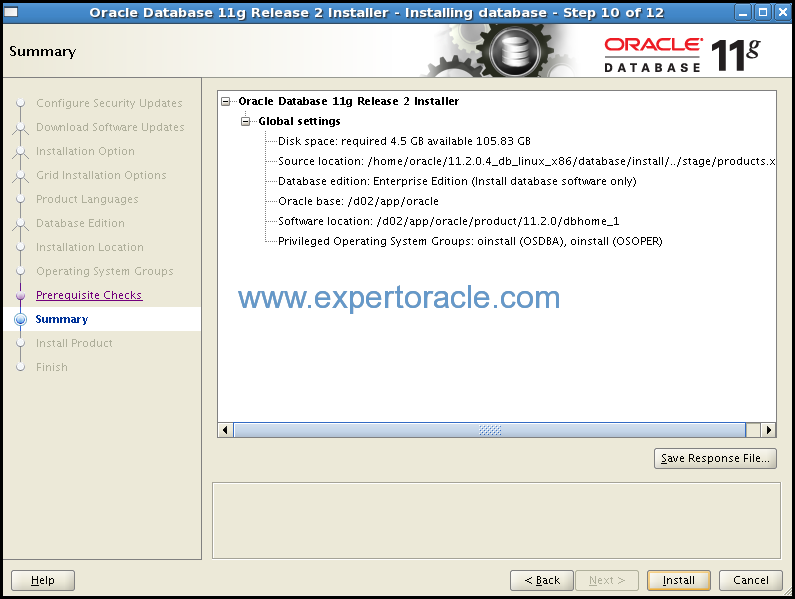
Click install, run root.sh script when it asks to and click finish in the end.
12. Set 11.2 environment
Make sure the following environment variables point to the Oracle 11g Release 2 (11.2) directories:
 export ORACLE_BASE=/d02/app/oracle
 export ORACLE_HOME=/d02/app/oracle/product/11.2.0/dbhome_1
 export PATH=$ORACLE_HOME/bin:$ORACLE_HOME/perl/bin:$PATH
 export LD_LIBRARY_PATH=$ORACLE_HOME/lib
 export PERL5LIB=$ORACLE_HOME/perl/lib/5.10.0:$ORACLE_HOME/perl/lib/site_perl/5.10.0
13. Run the script cr9idata.pl
On the database server node, as the owner of the Oracle RDBMS file system and database instance, run the following command to create the $ORACLE_HOME/nls/data/9idata directory.
$ perl $ORACLE_HOME/nls/data/old/cr9idata.pl
Now add below env variable also to .profile.
export ORA_NLS10= /d02/app/oracle/product/11.2.0/dbhome_1/nls/data/9idata
14. Install Oracle database examples
No matter how worthless it looks, but you need to install Oracle Examples or else your 11 i> R12.1.3 upgrade will fail later on.
$ cd <examples_cd>
 $ ./runInstaller
Follow GUI, put value as asked and click NEXT on promtps
15. Compile invalids in existing 9i database
Run utlrp script to fix any invalid object before the upgrade:
SQL> @$ORACLE_HOME/rdbms/admin/utlrp.sql
Note down invalid objects to compare with invalid ones after the upgrade to 11g:
 ------------------------------------------------------------------
 SQL> set pages 0
 SQL> set linesize 170
 SQL> select count(*) from dba_objects where status='INVALID';
 2
 SQL> select 'alter '||object_type||' '||owner||'.'||object_name||' compile;' from dba_objects where status = 'INVALID';
 SQL> alter PACKAGE BODY APPS.CS_WF_ACTIVITIES_PKG compile;
 SQL> alter PACKAGE BODY APPS.OKI_REFRESH_PVT compile;
16. Check for connect role
In 11g version CONNECT role has only the “CREATE SESSION” privilege, the other privileges are NOT exist in CONNECT role in 11g version like:
CREATE VIEW
CREATE TABLE
ALTER SESSION
CREATE CLUSTER
CREATE SYNONYM
CREATE SEQUENCE
CREATE DATABASE LINK
So you need to re-grant these privileges to users who have connect role after upgrade to 11g.
This SQL will help you just save the result in somewhere to run it after the upgrade:
SQL> set linesize 170
 SQL> set pages 100
 SQL> spool connect_role.sql
 SQL> SELECT 'grant CREATE VIEW,CREATE TABLE,ALTER SESSION,CREATE CLUSTER,CREATE SYNONYM,CREATE SEQUENCE to '||grantee||';'
 FROM dba_role_privs WHERE granted_role = 'CONNECT' AND grantee
 NOT IN ('SYS', 'OUTLN', 'SYSTEM', 'CTXSYS', 'DBSNMP','LOGSTDBY_ADMINISTRATOR',
 'ORDSYS','ORDPLUGINS', 'OEM_MONITOR', 'WKSYS', 'WKPROXY','WK_TEST',
 'WKUSER', 'MDSYS', 'LBACSYS', 'DMSYS','WMSYS', 'OLAPDBA', 'OLAPSVR',
 'OLAP_USER','OLAPSYS', 'EXFSYS', 'SYSMAN', 'MDDATA','SI_INFORMTN_SCHEMA',
 'XDB', 'ODM');
 SQL> spool off
17. Save dblink information
Create a script to save DBLINKS creation script:
sql> Spool dblinks
sql> SELECT 'CREATE '||DECODE(U.NAME,'PUBLIC','public ')||'DATABASE LINK '||CHR(10)
 ||DECODE(U.NAME,'PUBLIC',Null, 'SYS','',U.NAME||'.')|| L.NAME||chr(10)
 ||'CONNECT TO ' || L.USERID || ' IDENTIFIED BY "'||L.PASSWORD||'" USING '''||L.HOST||''''
 ||chr(10)||';' TEXT
 FROM SYS.LINK$ L, SYS.USER$ U
 WHERE L.OWNER# = U.USER#;
sql> Spool off;
18. Copy pre-upgrade script and execute
Copy the following scripts from 11g $ORACLE_HOME/rdbms/admin directory on 11g server to 9i server:
 Sqlplus “/ as sysdba”
 SQL> @utlu112i.sql
 utltzuv2.sql
Correct anything required as per generated report.
19. Gather schema statistics
Gather statistics for schemas:
SQL> EXECUTE dbms_stats.gather_schema_stats('CTXSYS',options=>'GATHER'
 ,estimate_percent=>DBMS_STATS.AUTO_SAMPLE_SIZE
 ,method_opt=>'FOR ALL COLUMNS SIZE AUTO'
 ,cascade=>TRUE);

 SQL> EXECUTE dbms_stats.gather_schema_stats('DBSNMP',options=>'GATHER'
 ,estimate_percent=>DBMS_STATS.AUTO_SAMPLE_SIZE
 ,method_opt=>'FOR ALL COLUMNS SIZE AUTO'
 ,cascade=>TRUE);

 SQL> EXECUTE dbms_stats.gather_schema_stats('MDSYS',options=>'GATHER'
 ,estimate_percent=>DBMS_STATS.AUTO_SAMPLE_SIZE
 ,method_opt=>'FOR ALL COLUMNS SIZE AUTO'
 ,cascade=>TRUE);

SQL> EXECUTE dbms_stats.gather_schema_stats('ORDPLUGINS',options=>'GATHER'
 ,estimate_percent=>DBMS_STATS.AUTO_SAMPLE_SIZE
 ,method_opt=>'FOR ALL COLUMNS SIZE AUTO'
 ,cascade=>TRUE);

 SQL> EXECUTE dbms_stats.gather_schema_stats('ORDSYS',options=>'GATHER'
 ,estimate_percent=>DBMS_STATS.AUTO_SAMPLE_SIZE
 ,method_opt=>'FOR ALL COLUMNS SIZE AUTO'
 ,cascade=>TRUE);

 SQL> EXECUTE dbms_stats.gather_schema_stats('OUTLN',options=>'GATHER'
 ,estimate_percent=>DBMS_STATS.AUTO_SAMPLE_SIZE
 ,method_opt=>'FOR ALL COLUMNS SIZE AUTO'
 ,cascade=>TRUE);

 SQL> EXECUTE dbms_stats.gather_schema_stats('SYS',options=>'GATHER'
 ,estimate_percent=>DBMS_STATS.AUTO_SAMPLE_SIZE
 ,method_opt=>'FOR ALL COLUMNS SIZE AUTO'
 ,cascade=>TRUE);

 SQL> EXECUTE dbms_stats.gather_schema_stats('SYSTEM',options=>'GATHER'
 ,estimate_percent=>DBMS_STATS.AUTO_SAMPLE_SIZE
 ,method_opt=>'FOR ALL COLUMNS SIZE AUTO'
 ,cascade=>TRUE);
20. Check Data Dictionary
Check for any corruption in the dictionary -will create a script then will run it-:
Script Creation:
Following code creates a script called analyze.sql
Set verify off
 Set space 0
 Set line 120
 Set heading off
 Set feedback off
 Set pages 1000
 Spool analyze.sql
 SELECT 'Analyze cluster "'||cluster_name||'" validate structure cascade;'
 FROM dba_clusters
 WHERE owner='SYS'
 UNION
 SELECT 'Analyze table "'||table_name||'" validate structure cascade;'
 FROM dba_tables
 WHERE owner='SYS'
 AND partitioned='NO'
 AND (iot_type='IOT' OR iot_type is NULL)
 UNION
 SELECT 'Analyze table "'||table_name||'" validate structure cascade into invalid_rows;'
 FROM dba_tables
 WHERE owner='SYS'
 AND partitioned='YES';
 spool off
Run the following scripts for Dictionary checking:
SQL> @$ORACLE_HOME/rdbms/admin/utlvalid.sql
 SQL> @analyze.sql
21. Check Database consistency
Ensure there is no files need media recovery or in backup mode:
SQL> SELECT * FROM v$recover_file;
 SQL> SELECT * FROM v$backup WHERE status!='NOT ACTIVE';
22. Resolve any outstanding unresolved distributed transaction
SQL> select * from dba_2pc_pending;
If that query returned rows you should do the following:
 --
 SQL> SELECT local_tran_id
 FROM dba_2pc_pending;
 SQL> EXECUTE dbms_transaction.purge_lost_db_entry('');
 SQL> COMMIT;
23. Ensure the users sys and system have ‘system’ as their default tablespace.
SQL> SELECT username, default_tablespace
 FROM dba_users
 WHERE username in ('SYS','SYSTEM');
24. Truncate aud$ table
Ensure that the aud$ is in the system tablespace when auditing is enabled.
SQL> SELECT tablespace_name
 FROM dba_tables
 WHERE table_name='AUD$';
Tip: Truncating AUD$ table will speedup the upgrade process (make sure to backup audit data before truncating it)
SQL> truncate table SYS.AUD$;
25. Saving database files location
Note down the location of datafiles, redo logs, control files.
col name for a70
 col file_name for a70
 col member for a70
 set feedback off
 spool db_files.txt
 SELECT name FROM v$controlfile;
 SELECT file_name FROM dba_data_files;
 SELECT group#, member FROM v$logfile;
 spool off
26. Set the database in NoArchivelog mode
Put the database in noarchivelog mode to minimize the upgrade time.
$ sqlplus "/as sysdba"
 SQL> shutdown immediate;
 SQL> alter database mount;
 SQL> alter database noarchivelog;
 SQL> archive log stop;
 SQL> shutdown immediate;
27. Apply additional 11.2.0.4 rdbms patches
For UNIX/Linux platforms, apply RDBMS patches
a) Patch 17468141
$ opatch apply
b) Patch 17501296
$ opatch apply
28. Disable database vault
If you have Database Vault installed, perform steps 1 to 6 of Part 2 of document 1091086.1 on My Oracle Support to disable Database Vault.
Check>
SQL> SELECT * FROM V$OPTION WHERE PARAMETER = ‘Oracle Database Vault';
PARAMETER VALUE
 —————————————————————-
 Oracle Database Vault FALSE
29. Make a backup of the init<sid>.ora file and edit
Make a backup of the init<SID>.ora file.
— “compatible” must be set to at least 10.1.0
-- Comment out obsoleted parameters if present:
DRS_START
 GC_FILES_TO_LOCKS
 MAX_COMMIT_PROPAGATION_DELAY
 PLSQL_NATIVE_LIBRARY_DIR
 PLSQL_NATIVE_LIBRARY_SUBDIR_COUNT
 SQL_VERSION
 hash_join_enabled
 DDL_WAIT_FOR_LOCKS
 LOGMNR_MAX_PERSISTENT_SESSIONS
 PLSQL_COMPILER_FLAGS
-- Replace all deprecated parameters like:
BACKGROUND_DUMP_DEST (replaced by DIAGNOSTIC_DEST)
 CORE_DUMP_DEST (replaced by DIAGNOSTIC_DEST)
 USER_DUMP_DEST (replaced by DIAGNOSTIC_DEST)
 STANDBY_ARCHIVE_DEST
 log_archive_start
 max_enabled_roles
 COMMIT_WRITE
 INSTANCE_GROUPS
 LOG_ARCHIVE_LOCAL_FIRST
 PLSQL_DEBUG (replaced by PLSQL_OPTIMIZE_LEVEL)
 PLSQL_V2_COMPATIBILITY
 REMOTE_OS_AUTHENT
 TRANSACTION_LAG attribute (of the CQ_NOTIFICATION$_REG_INFO object)
— set the parameter CLUSTER_DATABASE=FALSE
— Add the parameter DIAGNOSTIC_DEST to hold database logs:
diagnostic_dest=/u01/oracle/ora11g/11.2.0.1/diagnostics/testdb
Once the parameter file is modified as per your requirement (already done above), copy the file to the new 11.2.0.3 $ORACLE_HOME/dbs.
30. Create the diagnostic directory
Create the Diagnostic directory for the DB

 mkdir -p $ORACLE_HOME/diagnostics/testdb
31. Check environment variables
Make sure the following environment variables point to the Oracle 11g Release 2 (11.2) directories:
export ORACLE_BASE=/u01/oracle/<instance_name>/
 export ORACLE_HOME=/u01/oracle/<instance_name>/db/tech_st/11.2.0
 export PATH=$ORACLE_HOME/bin:$ORACLE_HOME/perl/bin:$PATH
 export LD_LIBRARY_PATH=$ORACLE_HOME/lib
 export PERL5LIB=$ORACLE_HOME/perl/lib/5.10.0:$ORACLE_HOME/perl/lib/site_perl/5.10.0
export ORA_NLS10=/u01/oracle/<instance_name>/db/tech_st/11.2.0/nls/data/9idata
32. Update the oratab entry
Update the oratab entry to set the new ORACLE_HOME pointing to <db_name> and disable automatic startup
/etc/oratab entries
 #<instance_name>:/u01/oracle/<instance_name>/db/tech_st/11.1.0:N
 <instance_name>:/u01/oracle/<instance_name>/db/tech_st/11.2.0:N
Note: After /etc/oratab is updated to have SID and Oracle Home (11.2), you can execute oraenv (/usr/local/bin/oraenv) and set the environment. The input has to be the SID which is entered in /etc/oratab against the 11gR2 home.
33. Stop database & applications
If not already stopped, stop the application and database running from old ORACLE_HOME.
34. Upgrade 9i to 11g using dbua or manual method
At the operating system prompt, change to the $ORACLE_HOME/rdbms/admin directory of 11gR2 Oracle Home.
$ export ORACLE_SID=testdb
 $ cd $ORACLE_HOME/rdbms/admin
 $ sqlplus “/ as sysdba”
 SQL> startup UPGRADE
Set the system to spool results to a log file for later verification after the upgrade is completed and start the upgrade script.
Create the SYSAUX tablespace:
 ----------------------------
 SQL>CREATE TABLESPACE SYSAUX
 DATAFILE '/d01/app/oracle/testdbdata/sysaux01.dbf' SIZE 2000M reuse
 autoextend on next 100m maxsize unlimited
 EXTENT MANAGEMENT LOCAL SEGMENT SPACE MANAGEMENT AUTO ONLINE;
 SQL> set echo on
 SQL> SPOOL upgrade.log
 SQL> @catupgrd.sql
 SQL> spool off
These measures are an important final step to ensure the integrity and consistency of the newly upgraded Oracle Database software. Also, if you encountered a message listing obsolete initialization parameters when you started the database for upgrade, then remove the obsolete initialization parameters from the parameter file before restarting.
Startup the database:
 $ Sqlplus / as sysdba
 SQL> STARTUP
Now Run catuppst.sql
Run catuppst.sql, located in the $ORACLE_HOME/rdbms/admin directory, to perform upgrade actions that do not require the database to be in UPGRADE mode.

SQL> @catuppst.sql
35. Review alert log for errors
You may find some errors in the alert log. Check that out and take corrective actions.
36. Verify the upgraded database
A) Check the upgraded database
SQL> select banner from v$version;
 BANNER
 --------------------------------------------------------------------------------
 Oracle Database 11g Enterprise Edition Release 11.2.0.4.0 - Production
 PL/SQL Release 11.2.0.4.0 - Production
 CORE 11.2.0.4.0 Production
 TNS for Linux: Version 11.2.0.4.0 - Production
 NLSRTL Version 11.2.0.4.0 - Production
B) Run utlu112s.sql script
Run the Post-Upgrade Status Tool $ORACLE_HOME/rdbms/admin/utlu112s.sql which provides a summary of the upgrade at the end of the spool log. It displays the status of the database components in the upgraded database and the time required to complete each component upgrade. Any errors that occur during the upgrade are listed with each component and must be addressed.
$ sqlplus “/as sysdba”
 SQL> STARTUP
 SQL> @utlu112s.sql
 SQL> @utlu112s.sql
 Oracle Database 11.2 Post-Upgrade Status Tool 11-09-2014 07:07:33
 .
 Component Current Version Elapsed Time
 Name Status Number HH:MM:SS
 .
 Oracle Server
 . ORA-01408: such column list already indexed
 . VALID 11.2.0.4.0 01:11:37
 JServer JAVA Virtual Machine
 . VALID 11.2.0.4.0 00:11:02
 Oracle Real Application Clusters
 . INVALID 11.2.0.4.0 00:00:02
 OLAP Analytic Workspace
 . VALID 11.2.0.4.0 00:01:13
 OLAP Catalog
 . VALID 11.2.0.4.0 00:03:19
 Oracle OLAP API
 . VALID 11.2.0.4.0 00:01:06
 Oracle XDK
 . VALID 11.2.0.4.0 00:19:21
 Oracle Text
 . VALID 11.2.0.4.0 00:02:57
 Oracle XML Database
 . VALID 11.2.0.4.0 00:06:13
 Oracle Database Java Packages
 . VALID 11.2.0.4.0 00:00:52
 Oracle Multimedia
 . VALID 11.2.0.4.0 00:14:00
 Spatial
 . VALID 11.2.0.4.0 00:15:39
 Final Actions
 . 00:04:39
 Total Upgrade Time: 02:32:10

PL/SQL procedure successfully completed.
You can ignore ORA-01408: such column list already indexed as shown in output.
Check components in dba_registry for status ‘VALID’
 set lines 150 pages 500
 column COMP_NAME format a45
 column version format a15
 column status format a12
SQL> select comp_name,version,status from dba_registry;

COMP_NAME VERSION STATUS
 --------------------------------------------- --------------- ------------
 Oracle XML Database 11.2.0.4.0 VALID
 Oracle Data Mining 11.2.0.4.0 VALID
 OLAP Catalog 11.2.0.4.0 VALID
 Oracle Text 11.2.0.4.0 VALID
 Spatial 11.2.0.4.0 VALID
 Oracle Multimedia 11.2.0.4.0 VALID
 Oracle Database Catalog Views 11.2.0.4.0 VALID
 Oracle Database Packages and Types 11.2.0.4.0 VALID
 JServer JAVA Virtual Machine 11.2.0.4.0 VALID
 Oracle Database Java Packages 11.2.0.4.0 VALID
 Oracle XDK 11.2.0.4.0 VALID
 Oracle Real Application Clusters 11.2.0.4.0 INVALID
 OLAP Analytic Workspace 11.2.0.4.0 VALID
 Oracle OLAP API 11.2.0.4.0 VALID

14 rows selected.
C) Run dbupgdiag.sql
Check for the integrity of the upgraded database by running dbupgdiag.sql script
Note 556610.1 Script to Collect DB Upgrade/Migrate Diagnostic Information (dbupgdiag.sql)
If the dbupgdiag.sql script reports any invalid objects, run
$ORACLE_HOME/rdbms/admin/utlrp.sql (next step)
After validating the invalid objects, re-run dbupgdiag.sql in the upgraded database once again and make sure that everything is fine.
D) Run utlrp.sql
Run $ORACLE_HOME/rdbms/admin/utlrp.sql multiple times to validate the invalid objects in the database, until there is no change in the number of invalid objects.
Note: This step will take some considerable time on first run
Keep monitoring the invalid count by
select count(*) from dba_objects where status =’INVALID’;
37. Resize redo log groups
Current redo log file size may not be adequate.. Review and change accordingly.
SQL> alter database add logfile thread 1 group 3 ('/d01/app/oracle/testdbdata/group_03.log') size 100M;
SQL> alter database add logfile thread 1 group 4 ('/d01/app/oracle/testdbdata/group_04.log') size 100M;
SQL> alter database add logfile thread 1 group 5 ('/d01/app/oracle/testdbdata/group_05.log') size 100M;
SQL> alter database add logfile thread 1 group 6 ('/d01/app/oracle/testdbdata/group_06.log') size 100M;
SQL> ALTER DATABASE DROP LOGFILE GROUP 1;
SQL> ALTER DATABASE DROP LOGFILE GROUP 2;
38. Check compatibility version
SQL> show parameter compatible
NAME TYPE VALUE
 ---------------------------- ----------- -----------------
 compatible string 11.2.0
If required, Change the compatibility version to use the new 11g features:
SQL> alter system set compatible='11.2.0' scope=spfile;
SQL> shutdown immediate;
SQL> startup;
39. Install OLAP
Verify that OLAP is installed in your database by using SQL*Plus to connect to the database as SYSDBA and running the following command:
SQL> connect / as sysdba;
 SQL> select comp_id from dba_registry where comp_id in ('AMD','EXF');
If the query does not return EXF, then you do not have Oracle Expression Filter installed. It is required by OLAP. To install Expression Filter, use SQL*Plus to connect to the database as SYSDBA and run the following commands:
SQL> select comp_id from dba_registry where comp_id in ('AMD','EXF');
COMP_ID
 ------------------------------
 AMD
SQL> connect / as sysdba;
 SQL> @$ORACLE_HOME/rdbms/admin/catexf.sql
 .. creating EXFSYS user
 .. loading the Expression Filter Java library
 No errors.
 No errors.
 No errors.
 No errors.
 No errors.
 No errors.
 .. creating Expression Filter dictionary
 .. creating Expression Filter PL/SQL Package Specifications
 No errors.
 .. creating Expression Filter catalog views
 .. creating Expression Filter private package in SYS schema
 .. installing Expression Filter APIs
 No errors.
 No errors.
 No errors.
 No errors.
 No errors.
 No errors.
 No errors.
 No errors.
 No errors.
 No errors.
 No errors.
 No errors.
 No errors.
 No errors.
 No errors.
 .. creating System Triggers for Expression Filter management
 No errors.
 .. installing Expression Filter indextype and operators
 No errors.
 No errors.
 No errors.
 No errors.
 No errors.
 No errors.
 No errors.
 No errors.
 No errors.
 No errors.
 No errors.
 SQL>
 If the query does not return AMD, then you do not have OLAP installed. To install OLAP, use SQL*Plus to connect to the database as SYSDBA and run the following command:
 SQL> select comp_id from dba_registry where comp_id in ('AMD','EXF');
COMP_ID
 ------------------------------
 EXF
 AMD
 SQL> connect / as sysdba;
 SQL> @$ORACLE_HOME/olap/admin/olap.sql SYSAUX TEMP
40. Perform patch post-install instructions
Run all the patch post install instructions that were mentioned earlier in this document.
41. Fix korean lexers
If you upgraded from 10.1.0 or previous releases, use SQL*Plus to connect to the database as SYSDBA, and run drkorean.sql using the following command:
$ sqlplus "/ as sysdba"
@$ORACLE_HOME/ctx/sample/script/drkorean.sql
 List of indexes that use KOREAN_LEXER as top level lexer:
 List of indexes that use KOREAN_LEXER as a sub lexer:
 "CS"."CS_FORUM_MESSAGES_TL_N4"
 "CS"."CS_INCIDENTS_ALL_TL_N1"
 "CS"."CS_KB_ELEMENTS_TL_N2"
 "CS"."CS_KB_SETS_TL_N3"
 "CS"."CS_KB_SOLN_CAT_TL_N1"
 "CS"."SUMMARY_CTX_INDEX"
 "ICX"."ICX_QUES_CTX"
 Migrate KOREAN_LEXER to KOREAN_MORPH_LEXER
 Rebuild all indexes that use korean lexer as top level lexer:
 Reindex all documents that use KOREAN_LEXER as sub lexer
 reindexing : "CS"."CS_FORUM_MESSAGES_TL" finished.
 reindexing : "CS"."CS_INCIDENTS_ALL_TL" finished.
 reindexing : "CS"."CS_KB_ELEMENTS_TL" finished.
 reindexing : "CS"."CS_KB_SETS_TL" finished.
 reindexing : "CS"."CS_KB_SOLN_CATEGORIES_TL" finished.
 reindexing : "CS"."CS_INCIDENTS_ALL_TL" finished.
 reindexing : "ICX"."ICX_QUESTIONS_TL" finished.
42. Start the new database listener
Copy over the listener.ora and tnsnames.ora from 9i tns_admin directory and edit them to correct the directory details etc and then start.
$ lsnrctl start <listener_name>
43. Run adgrants.sql
Copy $APPL_TOP/admin/adgrants.sql from the administration server node to the database server node. Use SQL*Plus to connect to the database as SYSDBA and run the script using the following command:
$ sqlplus "/ as sysdba" @adgrants.sql [APPS schema name]
44. Grant create procedure privilege on ctxsys
Copy $AD_TOP/patch/115/sql/adctxprv.sql from the administration server node to the database server node. If you are upgrading to R12, use the R12 version of the file. Use SQL*Plus to connect to the database as APPS and run the script using the following command:
$ sqlplus apps/[APPS password] @adctxprv.sql \ [SYSTEM password] CTXSYS
45. Set ctxsys parameter
Use SQL*Plus to connect to the database as SYSDBA and run the following command:
 $ sqlplus "/ as sysdba"
 SQL> exec ctxsys.ctx_adm.set_parameter('file_access_role', 'public');
46. Run autoconfig
Run autoconfig on both database and application nodes.
Shut down all processes, including the database and the listener, and restart them to load the new environment settings.
47. Gather statistics for sys schema
Copy $APPL_TOP/admin/adstats.sql from the administration server node to the database server node. Use SQL*Plus to connect to the database as SYSDBA and use the following commands to restart the database in restricted mode, run adstats.sql, and restart the database in normal mode:
$ sqlplus "/ as sysdba"
 SQL> alter system enable restricted session;
 SQL> @adstats.sql
$ sqlplus "/ as sysdba"
 SQL> alter system disable restricted session;
 SQL> exit;
48. Re-create grants and synonyms
Oracle Database 11g Release 2 (11.2) contains new functionality for grants and synonyms compared to previous database releases.
As a result, you must re-create the grants and synonyms in the APPS schema. On the administration server node, as the owner of the Applications file system, run AD Administration and select the “Recreate grants and synonyms for APPS schema” task from the Maintain Applications Database Objects menu.
49. Enable database vault (conditional)
If you disabled Database Vault, enable it by performing step 7 of Part 2 of document 1091086.1 on My Oracle Support.
50. Restart applications server processes and verify
Restart all the Application tier server processes that you shut down previously.
Remember that the Oracle Net listener for the database instance, as well as the database instance itself, need to be started in the 11.2 Oracle home.
51. Upgrade JDK to version 6.0
Download and install JDK 1.6
 [root@r12upg jdk645]# ./jdk-6u45-linux-i586-rpm.bin
 Unpacking...
 Checksumming...
 Extracting...
 UnZipSFX 5.50 of 17 February 2002, by Info-ZIP (Zip-Bugs@lists.wku.edu).
 inflating: jdk-6u45-linux-i586.rpm
 inflating: sun-javadb-common-10.6.2-1.1.i386.rpm
 inflating: sun-javadb-core-10.6.2-1.1.i386.rpm
 inflating: sun-javadb-client-10.6.2-1.1.i386.rpm
 inflating: sun-javadb-demo-10.6.2-1.1.i386.rpm
 inflating: sun-javadb-docs-10.6.2-1.1.i386.rpm
 inflating: sun-javadb-javadoc-10.6.2-1.1.i386.rpm
 Preparing... ########################################### [100%]
 1:jdk ########################################### [100%]
 Unpacking JAR files...
 rt.jar...
 jsse.jar...
 charsets.jar...
 tools.jar...
 localedata.jar...
 plugin.jar...
 javaws.jar...
 deploy.jar...
 Installing JavaDB
 Preparing... ########################################### [100%]
 1:sun-javadb-common ########################################### [ 17%]
 2:sun-javadb-core ########################################### [ 33%]
 3:sun-javadb-client ########################################### [ 50%]
 4:sun-javadb-demo ########################################### [ 67%]
 5:sun-javadb-docs ########################################### [ 83%]
 6:sun-javadb-javadoc ########################################### [100%]

Done.
Install Albany (Display) Font
Copy the following font files from $FND_TOP/resource to the JDK installation location [JDK60_TOP]/jdk/jre/lib/fonts directory (under OA_JRE_TOP and AF_JRE_TOP) on all Web and concurrent nodes.
The font files are:
ALBANYWT.ttf – Single-byte characters only
ALBANWTJ.ttf – Unicode font with Japanese Han Ideographs
ALBANWTK.ttf – Unicode font with Korean Han Ideographs
ALBANWTS.ttf – Unicode font with Simplified Chinese Han Ideographs
ALBANWTT.ttf – Unicode font with Traditional Chinese Han Ideographs
Apply Applications Interoperability Patches
A) 5622511- J2SE 6.0 CONSOLIDATED PATCH FOR USE WITH ORACLE EBS 11.5.10
PRE-REQ PATCHES
5006182 – FIELD SERVICE AND SPARES ROLLUP PATCH FOR 11.5.10
Post steps:
1. Please use the AD Administration Utility to regenerate the message files for
the product Field Service. (csfmdmsg.ldt or csrmdmsg.ldt).
2. Restart QApache Port.
B) 5977502 – EXCEPTION IS RAISED WHEN BUTTON IS PRESSED
Configure all Application Tier Nodes to Support JDK 6
Stop the application
txkrun.pl -script=SetJDKCfg -contextfile=$CONTEXT_FILE -runautoconfig=Yes -appspass= apps -jdktop= /usr/java/jdk1.6.0_45
Regenerate the Jar Files
Re-source the environment file
Regenerate the product jar files through ‘adadmin’ with the ‘force’ option set to ‘Yes’:
Generate Applications Files menu -> Generate product JAR files
Do you wish to force regeneration of all jar files? [No] ? Yes
Verify
Remove maintenance mode, Restart all Application Tier Server Processes and check application.
Run the AOL/J test page from a web browser using the following URL:-
http://r12upg.localdomain:8002/OA_HTML/jsp/fnd/aoljtest.jsp
Also,
$ADJVAPRG -version
 echo $CLASSPATH
$AFJVAPRG -version
 echo $AF_CLASSPATH
52. Using jre 1.7 with oracle apss 11i
We will upgrade our JRE to JRE 1.7.0_67 (7u67)
a) Apply required patches
ENABLE MAINTENANCE MODE
The JRE 7 Plug-in is certified for Oracle E-Business Suite 11i with the following minimum patch requirements:
i) Oracle Applications 11.5.10 CU2 with ATG.RUP6 (Patch 5903765) or higher.
<Already applied>
ii) Oracle Developer 6i Patch 19 (6.0.8.28.x)
<Already applied>
[oracle@r12upg ~]$ $ORACLE_HOME/bin/f60gen help=y
Forms 6.0 (Form Compiler) Version 6.0.8.28.0 (Production)
iii) Patch 9094950: APPLIED PATCH 8888184 RECEIVE ERRORS FRM-40723 ORA-00911 FRM-40505
Apply using adpatch
iv) Patch 16699473: MERGE REQUEST ON TOP OF 6.0.8.28.0 FOR BUGS 16542522 15828839 16399579
<Already applied>
v) Patch 9935935: APPLICATIONS INTEROPERABILITY PATCH FOR DEVELOPER 6I PATCHSET 19 (6.0.8.28.X)
vi) JRE Plug-in Oracle E-Business Suite interoperability Patch 6863618.
No pre or post steps
Download the JRE Plug-in
Download the Windows x86 Offline (32-bit) or Windows x64 (64-bit) version as required.
We downloaded “jre-7u67-windows-i586.exe”
Rename the JRE Plug-in and Place it on the Web Server
Rename the downloaded JRE Native Plug-in file to j2se<version>.exe
For example:
jre-7u67-windows-i586.exe would be renamed j2se17067.exe
Move the renamed j2se17067.exe file to the web application tier and place it in $COMMON_TOP/util/jinitiator.
Run the txkSetPlugin.sh Script
Run the $FND_TOP/bin/txkSetPlugin.sh script against the web node of the application tier.
The txkSetPlugin.sh script will update the new JRE version information into your AutoConfig context file, update the version used by Workflow and run AutoConfig to incorporate the new values throughout your application. This script must be run using the following command:
$ txkSetPlugin.sh jversion
For example; the command to install JRE 1.7.0_67 is:
$ txkSetPlugin.sh 17067
Disable maintenance mode and restart application services
Verify.
- Oracle Multitenant DB 4 : Parameters/SGA/PGA management in CDB-PDB - July 18, 2020
- Details of running concurrent requests in Oracle EBS - May 26, 2020
- Oracle Multitenant DB 3 : Data Dictionary Architecture in CDB-PDB - March 20, 2020



I have installed jdk-1_5_0_15-linux-i586-rpm.bin as you mentioned. It installed successfully.
inflating: jdk-1_5_0_15-linux-i586.rpm
Preparing… ########################################### [100%]
1:jdk ########################################### [100%]
Done.
But, while configuration, we did not get
# /usr/sbin/alternatives –config java
There is 1 program which provide ‘java’.
Selection Command
———————————————–
*+1 /usr/lib/jvm/jre-1.4.2-gcj/bin/java
Enter to keep the current selection[+], or type selection number:
I didn’t see * 2 /usr/java/jdk1.5.0_15/bin/java
Please can you help on this.
The newly installed Java should be at this location /usr/java/jdk1.5.0_15/
Try below:
[root@server bin]# cd /usr/java/jdk1.5.0_15/bin
[root@server bin]# pwd
/usr/java/jdk1.5.0_15/bin
[root@server bin]# /usr/sbin/alternatives –install /usr/bin/java java /usr/java/jdk1.5.0_15/bin/java 15015
After that below command should show you new versions also.
# /usr/sbin/alternatives –config java
Hi Brijesh,
I am getting following error. Please help.
alternatives version 1.3.30.2 – Copyright (C) 2001 Red Hat, Inc.
This may be freely redistributed under the terms of the GNU Public License.
usage: alternatives –install
[–initscript ]
[–slave ]*
alternatives –remove
alternatives –auto
alternatives –config
alternatives –display
alternatives –set
common options: –verbose –test –help –usage –version
–altdir –admindir
Hi,
I am also unable to open forms.
Please help on this.
Ramaraju,
For alternative error> Which OS and version you are working on?
For forms error > It should be common error related to recommended browser/jinitiator. Look at “Recommended Browsers for Oracle Applications 11i (Note 285218.1)”. Also see step 52 of this post.
OS version is OEL 5.8, 32 bit.
alternatives works by changing a symlink in the /usr/bin directory, can be done manually or do below
Copy jdk-1_5_0_17-linux-i586.bin(or any other version) to /usr/java
[root@r12upg bin]# cd /usr/java
[root@r12upg bin]# ./jdk-1_5_0_17-linux-i586.bin
[root@r12upg bin]# /usr/sbin/alternatives –install “/usr/bin/java” “java” “/usr/java/jdk1.5.0_17/bin/java” 3
[root@r12upg bin]# /usr/sbin/alternatives –install “/usr/bin/javac” “javac” “/usr/lib/jvm/jdk1.5.0_17/bin/javac” 3
[root@r12upg bin]# /usr/sbin/alternatives –config java
select java
[root@r12upg bin]# /usr/sbin/alternatives –config javac
select javac
[root@r12upg bin]# java -version
java version “1.5.0_17”
Java(TM) 2 Runtime Environment, Standard Edition (build 1.5.0_17-b04)
Java HotSpot(TM) Client VM (build 1.5.0_17-b04, mixed mode, sharing)
Thank you, I am able to open the forms.
Hi Brijesh,
Is it possible to separate the tasks(activity) into two parts? The apps tasks and the database tasks?
Then is it possible to do all the task first pertaining to the database tier? without touch the apps tier first?
Then after the db tier task, I will do the apps tier tasks?
This way seem easier and faster because you do not have to login back and forth between apps and db tier.
Thanks
Dear Guru
Upgrade database 9.2.0.5 to 11.2.0.4 in EBS 11i
Is there any doc for 64bit solaris environment
Regards
Quazi Abdur Rab
qarabus at yahoo com